Here is a pop-up card made using the Tim Holtz Townscape On the Edge die. As their name suggest, these dies are designed to provide a decorative edge to pieces, but I found a way to use them to do pop-up inserts for a card.
The insert consists of two parts: The front art piece that is attached to the inside bottom of the card, and a brace that is attached to the inside top that actually pulls the front back when the card is opened. For illustration purposes I've used manilla cardstock for the front, and kraft paper for the brace, but you can imagine the possibilities. Various shades of blue alcohol inked glossy card stock covered with Rock Candy Distress Stickles cut against the snowflake die, anyone?
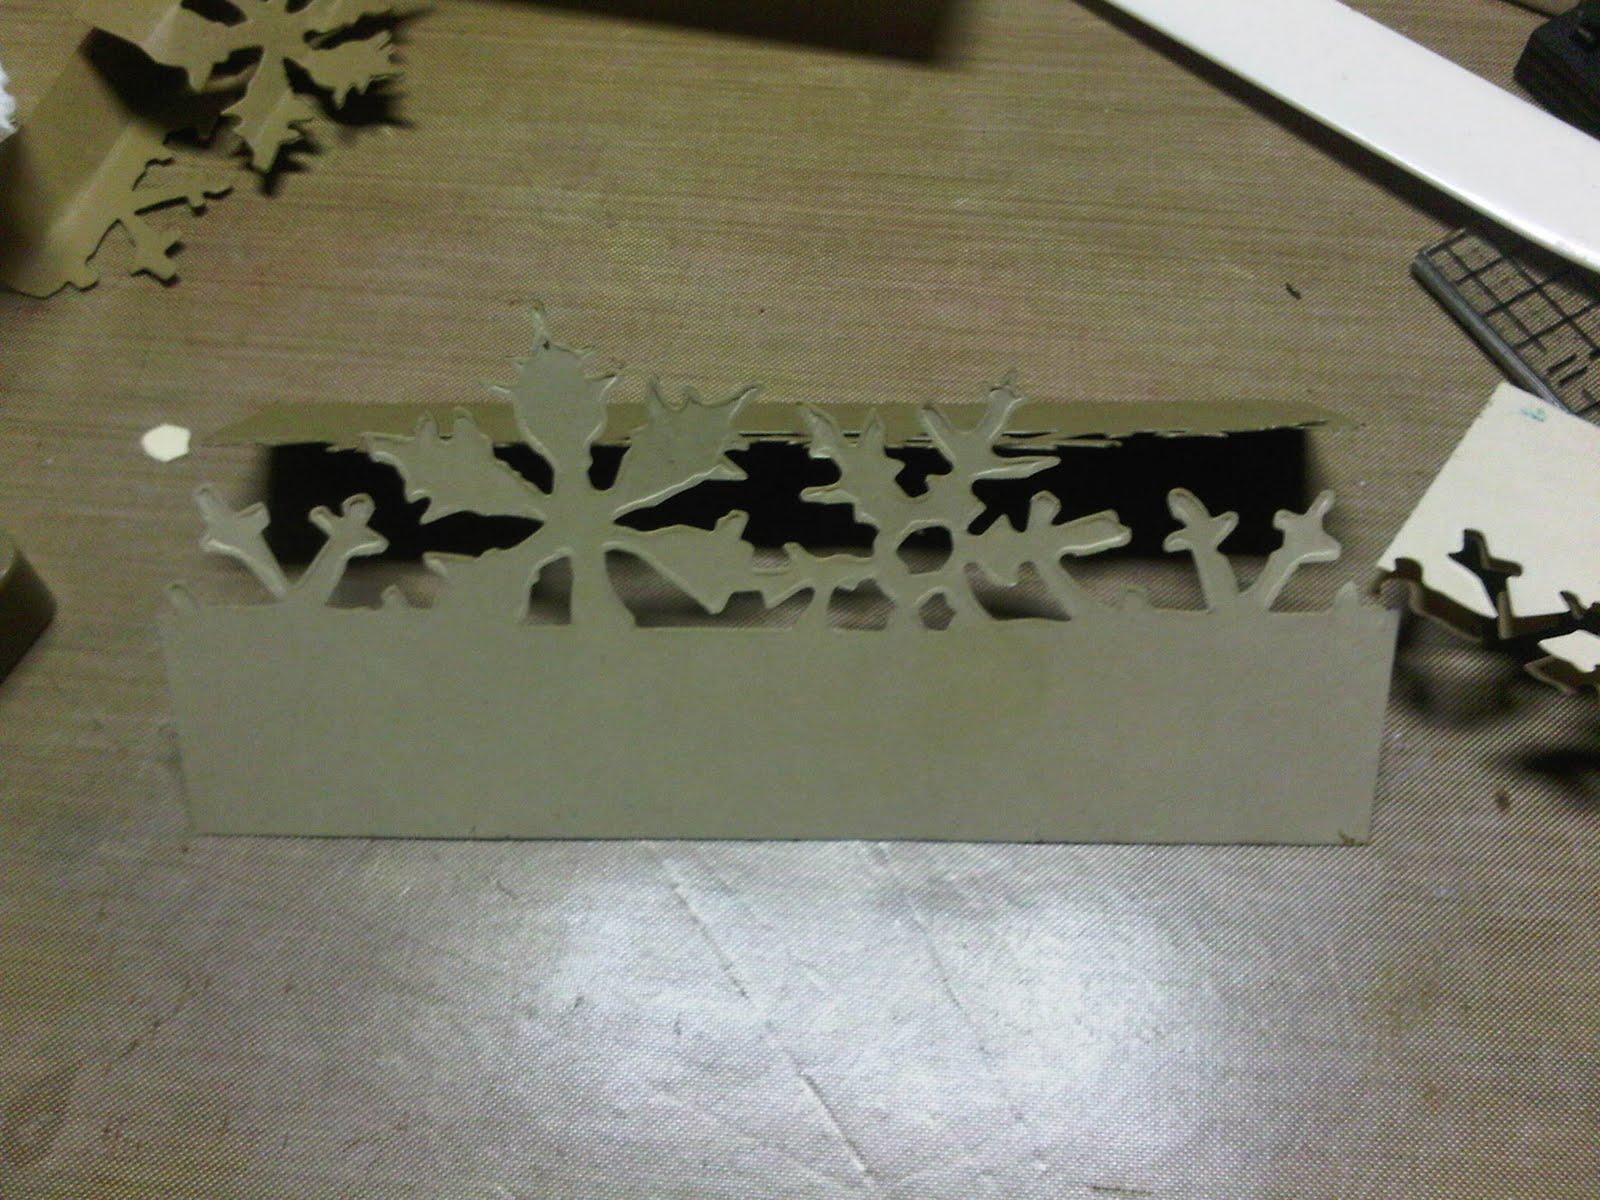
Another view showing how the brace attaches to the art in the back. The brace is attached to the back of the art and cut as the same time, so any cutouts line up perfectly.
Here's how to do it step by step. Start with the front and brace pieces. They should be 5 1/2 inches wide, and about 3 includes long. Basically about the same size an On the Edge die. Some of the top will be cut off, and we need to include some space at the bottom for tabs to attach to the card.
Now get your On the Edge die, and find a line that includes 1/4 to 1/3 of the top of the part that is actually cut. You can see here the Townscape die is ideal for this because I can include all of the roofs.
I placed a pencil mark on the side of the die so I could know where that line is, then I measured from the top of the foam pad to the mark. This is so I know how where to score my brace in a next step.
Using the measurement obtained on the die, score and fold the brace,
Now glue the top part of that brace (only) to the back of the front piece. Make sure to get right up to the fold on the brace with the glue. This is part the actually pulls against the front to bring it upright. You should end up with a piece that looks like this.
Now cut the piece with the On the Edge die through your die cut machine. Align the top edge with the top of the foam in the die so that the fold is in the same location as your measured. Note that in this snowflake die, the small flakes on the side don't attach to my brace, so I'm actually going to remove those parts of the brace. You could leave them on if you wish.
Now I score and fold the bottom of both the front and the brace. Where you score the front depends of how much of the uncut part you want showing. I actually trimmed a bit from the front and brace. You don't need a massive amount to attach to the card. The front and brace should the scored at the same place relative to the first fold you made. So if the front is folded one inch below the first brace fold, the second brace fold should also be one inch from the same point.
If you didn't measure in the last step, make sure the measure now the distance on the brace between the first fold and the second fold. I'm actually measuring the distance here on the front instead of the brace.
The measurement obtained previously is how far out from the fold on the card the front should go.
Glue the folded of the front piece to inside bottom to the card.
Now attach the (second) folded part of the brace to the top of the card. To do this, bring all of the brace and front flat against the bottom of the card and put some adhesive on the folded part of the brace.
Close the front of the card and press against where the glued part of the brace is and let dry. When you open the card, the brace should be attached is just the right spot.
As I mentioned previously, the snowflake die is a little tricky because it doesn't have a brace on the smaller flakes, so they doesn't pop up quite as much as the middle. This should be too much of an issue.
Once you understand this technique, it should be easy to apply to other dies as well. There's an insert that was made with a Mover & Shaper word die that was made put by cutting a piece of folded card stock and then folding the attachment pieces on the top and bottom.


Hello Ron,
ReplyDeleteI love pop-up cards and was really looking forward for your tutorial when you posted your previous card.
As I have to translate your tutorial in my mind in my own language it will require some rereading... but I know I will figure it out with your explanation.
Thanks a lot for the effort to make this tutorial and thanks for sharing with us. Not everyone wants to share...
greetings from Belgium
Inge
Fantastic tutorial - thanks so much for sharing. Will be giving it a go, those snowflakes ones will make excellent christmas cards - thanks again Sam xxxx
ReplyDeleteThis is awesome! i was just looking for a tutorial of a card to impress a friend i call 'queen of cards'! lol this 'll do it!
ReplyDeleteThank you for a great tutorial, the results are superb. Enjoy the weekend, Annette
ReplyDeleteThanks for taking time to share the step by step tutorial.
ReplyDeleteI must get my townhouse die ready and practice.
VERY CLEVER!!! Thanks for taking the time to make a tutorial for all of us!!
ReplyDeleteGreat Idea and great tutorial.
ReplyDeleteThese are awesome! Thanks so much for sharing your idea! Fabulous job figuring that all out!!
ReplyDeletePam
This looks fabulous. Thanks for sharing the how to.
ReplyDeleteGreat idea, thanks for sharing!
ReplyDeleteRon thanks so much for sharing this tutorial. It must have been quite a challenge to get every piece just right. But I love the results and will have to give it a go!
ReplyDeleteLike the other responses . . . thanks for sharing a wonderful tutorial!
ReplyDeleteHi Ron! I wanted to pop in and say thank you for leaving a nice comment on my blog today about my Sampler for the Simon Says Stamp and Show Challenge. While I was here, I checked out your blog! Really neat stuff! Love this tutorial on pop up cards! <3 Candy
ReplyDeleteWanted you to know I posted a link to this tutorial today on my blog.
ReplyDeleteNancy ward
PaperFriendly
http://www.nancywardcrafts.com
What a absolutely amazing project! And a great tutorial!
ReplyDeleteI nominated you for the Liebster Award. Please check out my blog to accept the award.
http://scrappycupcakes.blogspot.com/2011/05/liebester-award.html
So happy you shared this Ron, Thank you mucho.
ReplyDelete